Wednesday 31 August 2016

Re-match live on Tabletop Commanders Paint & Chat.

After yesterdays crushing defeat for the Westerners a new battle was set up, with a slight modification to the forces of both sides. Lion Rampant was again used, and a fun game was had. I didn't take any photos but it was all recorded live on Tabletop Commanders, so you can see a dice by dice, blow by blow, battle. Just click the following link:

https://www.youtube.com/watch?v=dC4ex4t1_UE


The forces arrayed for the battle.


The Westerners swapped out a unit of spears for an extra unit of light cavalry.


The Easterners, replaced one unit of mounted archers for foot archers.


Looking along the Easterner's battle line.


The same with the Westerner's battle line.


It was a quick and fun battle, fought out with my good buddy Kurtus taking the Westerners and myself commanding the Easterners. However, Lion Rampant does what it says on the tin, it is a skirmish game and not really suited to battle lines advancing across the table.
So I am now in the process of refreshing myself on the Basic Impetus rules for the next battle in this series and have chosen two armies to contest the battlefield.


Taken from the Basic Impetus army lists, Here is Saladin's force. CM is medium cavalry, CL is light cavalry, T is missile Troops and FL is light infantry.


Here is Saladin's force laid out as per the above list. A unit of Kurdish Javelins is just out of shot at the bottom of the photo.


The forces of Richard of York, CP is heavy Cavalry, FP heavy infantry and S is skirmishers.


And here they are as per the list above.


The Westerners have the option to change out some units as listed below.


These are the troops that could be used if any of the options are selected.

I hope to fight this battle on Thursday or Friday night, once again live on TtC, so be sure to have a look.

Tuesday 30 August 2016

Eastern Revenge

After yesterday's battle between the Eastern raiders and the village defenders. A larger battle today, double the size to ten stands each, I haven't bothered too much about points and have added pretty much what I wanted. Due to the small size table, I will convert from inches to centimetres too. It will look a little odd in 28 mm, but needs must.

After receiving a bloody nose in their attempt to raid a village, the Eastern raiders have returned, and this time they mean business! The leader has gathered a large army to teach the infidels a hard lesson. Expecting another attack, the Westerners also called to their lord for help in repulsing the threat. The lord gathered his forces and rode out to meet the challenge to his domain.

The table will be virtually devoid of scenics, there won't be any room! As you can see, the two forces fill up half of the table already.


The Western defending army comprises ten units.


As do the invading Easterners.


A breakdown of the Western Army. Two units of mounted men at arms with the general in the left most unit as well as a single unit of light cavalry.


Three units of spear men.


Two units of men at arms.


Two units of archers.


Breakdown of the Eastern Army. Two units of heavy cavalry. Saladin leads the right most unit.


Two units of mounted archers.


A single unit of mounted javelins.


Two units of elite heavy infantry.


Finally are three units of spear men.

The initial deployments.


The Westerners from left to right, Two units of mounted men at arms, spears, archers, men at arms, spears, archers, men at arms, spears and finally light cavalry.


The Easterners from left to right, Two unit of heavy cavalry, elite spears with mounted archers ahead, three units of spears with mounted archers ahead, elite spears and mounted javelins.


Facing off. The green patches on the left will be classed as difficult ground, reducing movement by half, the small stream on the right will have no effect on movement.


Right from the off, the Eastern light horse troops advanced as did the rest of the force. The Westerners advanced their archers and also the light cavalry.


Mounted javelins face light cavalry on the flank.


The two units of horse archers make hit and run raids on the enemy.


The spears lose a man.


As do this unit of archers.


The two unfortunates.


The mounted javelins score hits on the light cavalry, removing two casualties resulting in the unit being battered and forced to pull back.


In the centre, the horse archers continue to cause hits on archers and spears.


The dead pile grows, but it only contains Western troops so far.


The whole Eastern army continue to advance, whilst the Westerners are being pinned back by the enemy light troops.


Yet again the javelins rush in and reduce the light cavalry before pulling back. The tactic is working brilliantly all along the line with the mounted archers also causing losses and chaos.


The space in the centre was occupied by a unit of archers who were forced to rout from the field.


The growing pile of bodies still only contains Western troops.


The Westerners are still pinned on their start line by light troops as the Easterners heavy foot and horse continue to advance. 


The light cavalry suffer again at the hands or rather the javelins, though they too now suffer a first loss.


Arrows pepper the mounted archers, causing a casualty as well as forcing them back with a battered marker.


In a disastrous turn for the Westerners, two units of spears, already forced to the back edge of the table, fail to rally after taking yet more hits and both rout from the field.


The dead pile now contains two units of spears, one of archers, light cavalry and a smattering of archers. The Easterners have just two casualties!


The mounted javelins finish off the light cavalry and bring the battle to an end, The Westerners are forced to concede the battlefield to the enemy.


The horse archers in the centre have been reduced to two figures as well as being battered, but it is too little too late.


The final dead pile, ignore the heavy cavalry at the bottom of the picture. A decisive victory for the Easterners who only lost five of their light troops.

I intend to re-fight this battle, but will swap out a unit of spears for more light cavalry. The lack of a skirmish line for the Westerners allowed the enemy light horse, archers and javelins, to cause casualties, battering and forcing back of units. They lost the battle before they could even get to grips with the enemy.

I did fight this battle on last night's Tabletop Commanders paint and chat if you wish to watch it in real time.


Sunday 28 August 2016

Raid from the East.

A battle report using Lion Rampant, each side has 24 points and the rules are a modified version known as Wars of the Roses Rampant. This will be the first time my newly painted Arab warriors will get a run out on the battlefield.

It may seem odd that I have placed the soldiers on movement trays, there are two reasons for this, firstly I don't like to constantly handle the delicate figures and secondly I find it irksome to move them all individually. As long as you ignore frontages, which of course there are none in Lion Rampant, and keep the bases three inches apart, it works well.


The raider force consists of one unit of heavy cavalry, at the rear with shields and spears, I am giving them the same stats as mounted men at arms. Beside them are two units of mounted archers. In the front one unit of elite spears, same stats as men at arms and one unit of spear men.


The defenders have on unit of mounted men at arms, two units of archers, one unit of men at arms and one unit of spear men.


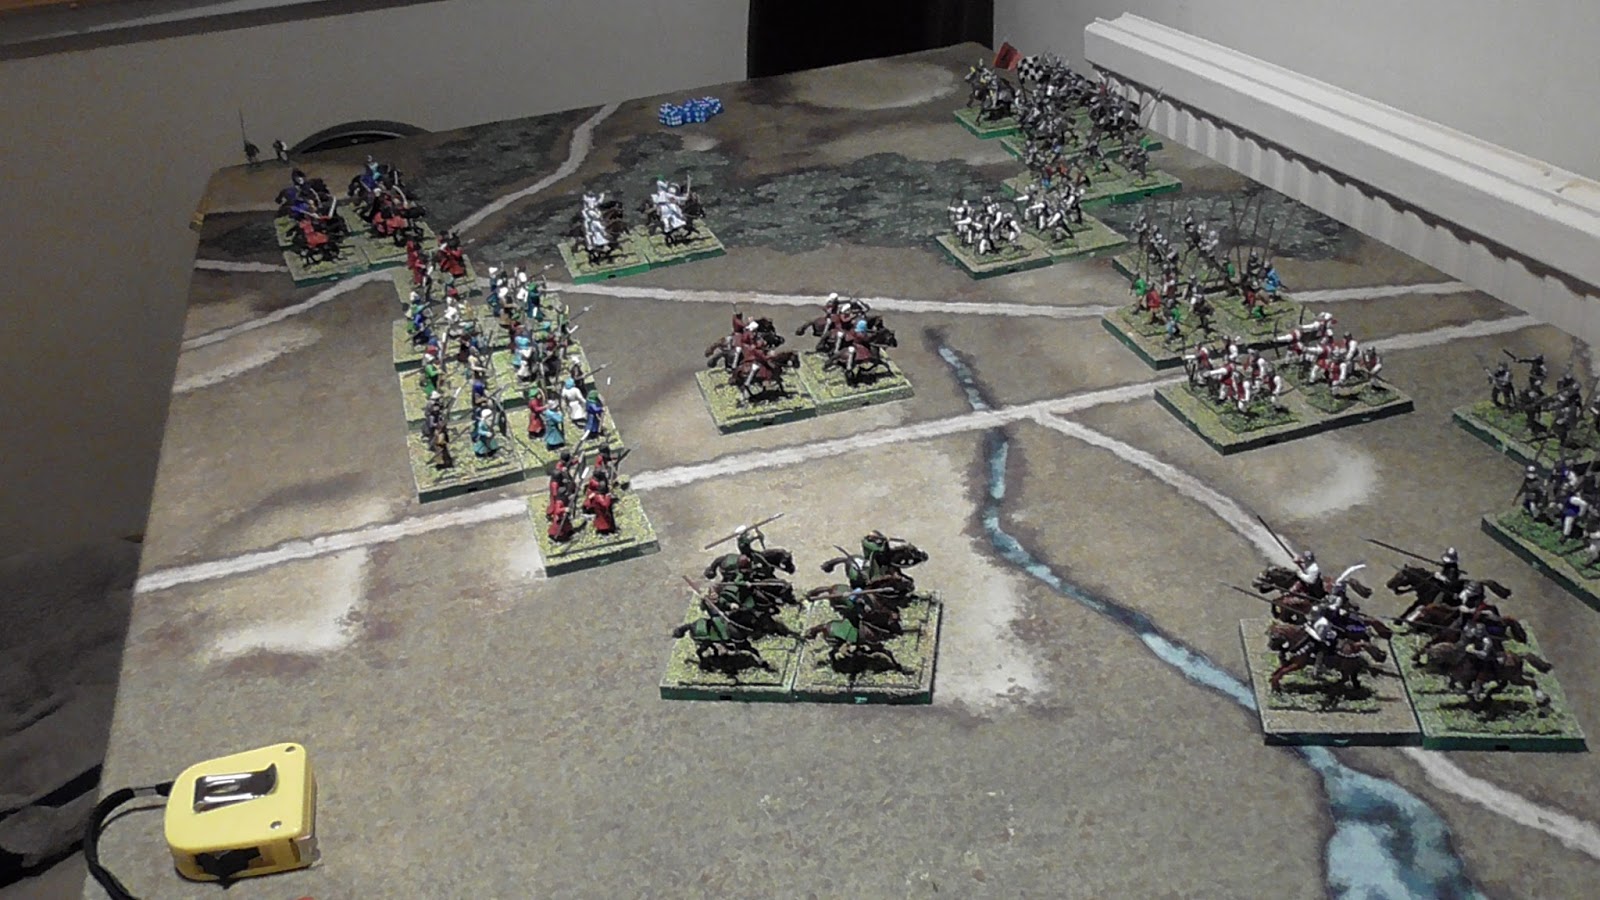
The table, ignore the troops for the moment, a village on the right side with crop fields, some open ground and then a heavily forested area with a single road giving access to the village.


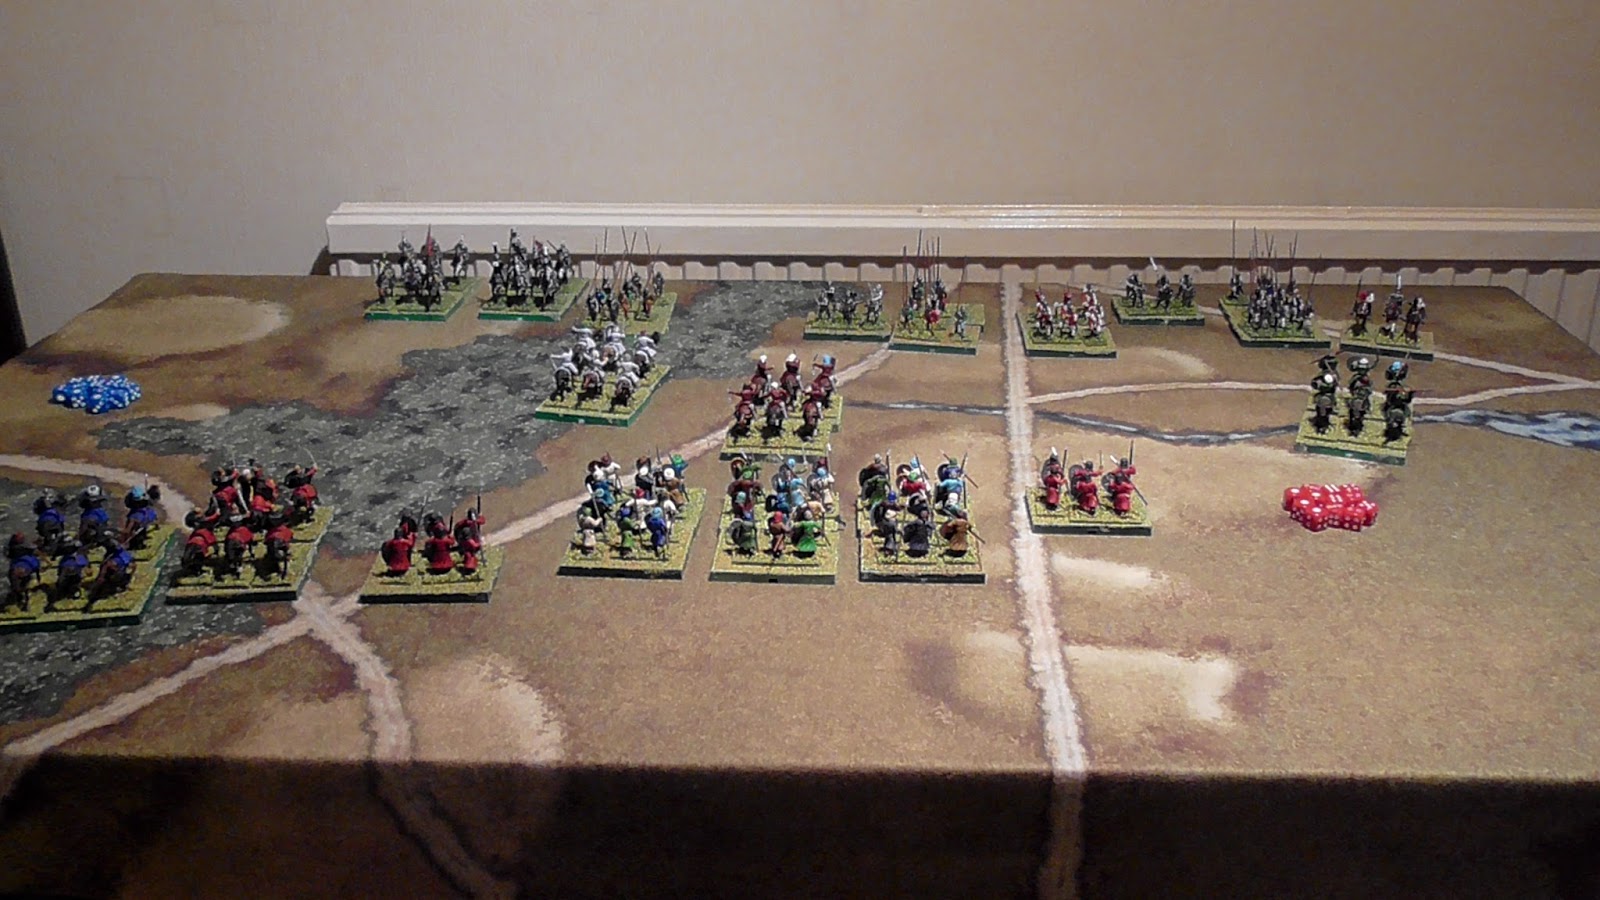
Initial defender deployment.


The raiders are forced to take the only track through the forest. a unit of horse archers leading the way.


The heavy cavalry and horse archers are actually off the table on the track behind the elite spear men.


The opening moves saw the raiders advancing down the track.


A unit of horse archers galloping off towards the village.


This was my first mistake, I should have only advanced the mounted archers to bow range of 12 inches. Their fire was ineffective against the spear men.


In the defenders turn, they moved the spear men to within two inches of the mounted archers as well as moving up their archers and men at arms.


The archers, bottom right, unleashed a volley at the raiding spear men and caused one hit. The spear men on both side have the special rule of committed, meaning they do not have to test against their courage until the unit is reduced to half strength.


The first casualty of the battle.


It was now my error with the mounted archers would prove to be fatal.


The spear men declared a charge and passed with a roll of 6, however the mounted archers needed a 7+ to evade, they failed and in doing so would have to take the charge full on with a reduced armour of 1. Ouch!


The roll was five hits on the archers scoring of course five kills. In return the two hits was not enough to remove a single spear man.


With a single figure remaining, his courage of 5+ adding on five casualties, required a roll of 10. He just failed and so routed from the field. This was actually incorrect as reported later. I learned my lesson, use mounted archers to hit and run, do not leave them in a position to be contacted.


The unfortunate unit joins the dead pile.


With spirits raised the defenders advance, even the mounted men at arms passed their movement roll.


The raiders too continued with the attack.


Units pressing forward, including the second unit of mounted archers looking to avenge their fallen colleagues. 


The raiders heavy cavalry still have not moved, they cannot pass the movement roll of 7+


The defenders men at arms charge into the spear men, causing two hits, but suffering two of their own.


The figures removed. Neither side requires to take courage tests as both have the committed special rule.


The mounted archers get off another ineffective volley, but this time they pull back after firing.


This time the spear men charge the men at arms, resulting in one kill for none of their own.


The mounted men at arms are forced to pull back, and being now down to half strength, needed to pass a courage test, which they did.


The defending spear men advanced on the horse archers.


Straight into the charge range of the elite spear men


The spear men were pushed back with two casualties, the elites suffering one.


The mounted archers finally got in a decent volley and took out two of the spear men.


The spear men now reduced.


The melee continued between the spear men and men at arms. Both inflicting two casualties.


The sole remaining man at arms was forced to pull back.


He failed to rally and so routed from the field.


The raiders heavy cavalry finally started to move down the track.


The current state of the battlefield, honours are about even with each side losing a unit plus some spear men.


The archers let loose on the spear men.


Causing one hit, it was here I realised a mistake I had been making, the problem with not playing for a while. 


The spear men failed their courage test, they should have become battered and moved back, but I routed them!


The other unit of archers then took a shot at the elite spear men, but just failed to cause a casualty.


The spear men attacked the elite spears


The defender's spear men failed to cause a casualty whilst suffering a loss of one man and were pushed back.


The mounted men at arms begin to move up.


This time the raider's elite spear men crash into the enemy, causing two casualties for one of their own.


The same mistake again! They failed their courage test and should have fallen back battered, but I routed them from the field. At least I am consistent.


The archers let loose on the victorious elites and cause one hit.


Continuing with my error, the elites failed their courage test and routed.


The commander of the raiding party, still stuck on the track through the forest, realises he has lost three units and withdraws from the field. He will report to a higher authority and they will be back for revenge!

A very enjoyable game, despite my errors with the battered/routed units. As it was the same for both sides no real harm done. I learnt a few things fighting this battle and will be better prepared for the next encounter.

I hope you enjoyed it.