Tuesday 28 February 2017

More thoughts on my Imagi-Nation continent of Culm.

Back on the 8th February this year, I posted an article to this blog entitled 'A Germ of an Idea. In which I mentioned using a map of Ireland as a continent, and picking a part of it for my Imagi-Nations campaign. I was going to keep all the original names of counties, towns, rivers etc. but have now decided to actually rename them all. I shall still be using Ireland, as I love the topography of the whole island.

I have selected an interesting part of Ireland (Culm), for the first three of my new nations. We have an ocean to the east, a series of mountain or hill ranges, running roughly north/south, rivers, and of course main road systems linking towns.


This is pretty much the same area as above, with the counties and their borders. I am looking at Wicklow on the east coast, it will be renamed 'Walivia.' on its south west border is Carlow, now to be named 'Cadesh,' which has a western border with Kilkenny 'Kiracia.'

Of course the surrounding countries of Darini (Dublin), Kaohaken (Kildare), Lothoir (Laois), Tasilan (Tipperary), Walemeth (Waterford) and Wiceameth (Wexford), could all be drawn into the conflict.


The final map is an attempt to combine the two previous, placing each country in the physical land. Not too easy to read, but flicking between the other two, easy enough to work out what is going on, and sets the towns etc, down on the natural features of the land.


There is still much to be done of course, the books by Don Featherstone and Tony Bath, are a mine of information, as are a few blogs I have found. All good inspiration, as was the arrival of my two boxes of Marlborough troops.

I will continue to post updates on Culm as and when there is something to share.

Monday 27 February 2017

A few test figures from the Marlborough Box Set.

I couldn't resist making up a few test figures from the box set. There are enough infantry in each box to make up 2 x 24 man regiments, and that is the route I intend to take. Bearing in mind I have two of the starter sets, this allows me to build four infantry regiments for each of the two main protagonists. Other nations can be added later as required.


The figures washed and the heads attached. Unlike the AWI box set, these figures come with arms already attached, which I find a lot easier, as it is very easy to mix the wrong arms etc. or at least it is for me.


The sculpts are very nice, the guy on the left is either a poor mould, or he is just plain dog ugly!


I then brushed on Vallejo primer.


They are now ready for the colour to be added, which of course, being Imagi-Nations, is the fun part.


Unlike the Liberty or Death box set, these figure come with arms already attached for the most part, drummer, officer and standard bearer, do require assembly. I have put on the first layer of flesh, hair and blocked in the hats, jacket and breeches.


One figure of each regiment/battalion will be painted as a representative of each regiment, so the cuffs, waistcoat and hat lace, can be in whatever colours I choose to represent that particular regiment.


It will be the same for the other nation. All regiments will be made up of six stands of four figures, four being the standard infantry figure, one being command and finally one of grenadiers. The latter company can be split off from its parent to form a combined grenadier battalion with grenadiers from other regiments.


Some unit facings added.


Well they certainly look different.


Next will be the shoes, belts and bag. I also better write down all the colours I used too, for when the rest of their mates join them.

Saturday 25 February 2017

Marlborough's Wars Starter Box Set.

A quick look at the contents of the set.


Lots of bases, three sprues of horses, four sprues of riders, lots of options here, three sprues of artillery with a mounted commander on each, finally, seven? oh dear, there should be eight, to allow four 24 man infantry units. I have emailed Warlord, the other box was complete.


The sprue maps, flags, uniforms etc, on very nice leaflets.


Bases for the twelve cavalry and three mounted officers.


Single bases for the infantry and artillerymen.


Artillery sprue.


Horses


Cavalry bodies.

Infantry.

Very pleased with these sets, just a shame a sprue of infantry was missing, but I am sure Warlord will respond to my email and make it good.

Tuesday 21 February 2017

Lion Rampant - Some Thoughts and an update on the Campaign Game.

After the latest battle of the Campaign of King Hugh III of Rosmia, I felt somewhat cheated and disappointed by the poor showing of the mounted archers and mounted javelins. These units are not designed for close combat, and should be used to charge in, loose their arrows or throw their javelins, then quickly move away. They are best suited to attack already weakened opponents.

However, they are only allowed to make a half move (5 inches) to skirmish. The loosing of the weapons can occur either before or after the half move. The movement rate for these unarmoured light troops is ten inches, exactly the same as the lumbering heavily armoured mounted men at arms.

OK, I can live with that, if you close with an enemy, you should become vulnerable. These light units also have the ability to evade, in this situation, if they successfully roll a 7+, they loose/throw their arrow/javelin at the unit charging them, and then make a half move directly away. If the charging unit fails to make contact, all is well, but if the evade roll is failed, then the unit cannot move, loose its weapons, and its armour is reduced to 1. Needless to say, an attacking unit of mounted men at arms, if at full strength roll twelve dice and hit on 3+, simply roll over and totally destroy their lighter foe.

This is of course exactly what you would expect, but should those heavy horse even get close in the first place?

I have looked at some home grown adaptations of Lion Rampant, namely Manor Rampant and Roses Rampant, to see if they addressed this problem. It appears not, maybe I am the only one who thinks the rule harsh.

I intend to have a practice battle with my Arab units, before they are put away and incorporate some house rules of my own.


* For mounted archers and javelins, I will increase their movement from ten to twelve inches, not a lot of difference, but could be enough to get it out of range of a charge.

* They can now move 6 inches before or after skirmishing.

* Evade, they can choose to make a fighting evade, just as the rules stand, i.e. on a 7+ they skirmish and make a half move away, if they fail to make the roll, then the above penalties come into force.

* Full Evade, this time, they forego the option to skirmish and on a successful movement roll of 5+ they move a full 12 inches away from the charging unit.


I also want to try out a unit or two of Scurrers or Prickers, these are light cavalry, still quite powerful, and can charge and counter-charge, but not as potent as full mounted men at arms.

This unit of twelve figures could also represent mounted archers, in the WotR, archers didn't shoot from horseback, but would have poor quality horses to get them from point A to B faster, they would then dismount and become a unit of foot archers. A precursor to dragoons. Both the previously mentioned supplements for Lion Rampant cover this subject and offer stats as well.

I will make a post on how the revised rules work, or don't work, as the case may be.


Onto the campaign, General Barnardus, as you have read, successfully invaded Ethus and defeated the army of Sheikh al Taif. A roll of the die for the following year, firstly indicated a Rosmian invasion of Uskax, they of course made peace after the death of Baron Charlet, The re roll is a full invasion of Rosmia by Baron Jacobus of Agliuna. That army consists of four mounted men at arms and one unit each of foot knights and spears/bills.

Monday 20 February 2017

The Battle of Haj Tepe Ridge. Part Two.

TURN THREE.

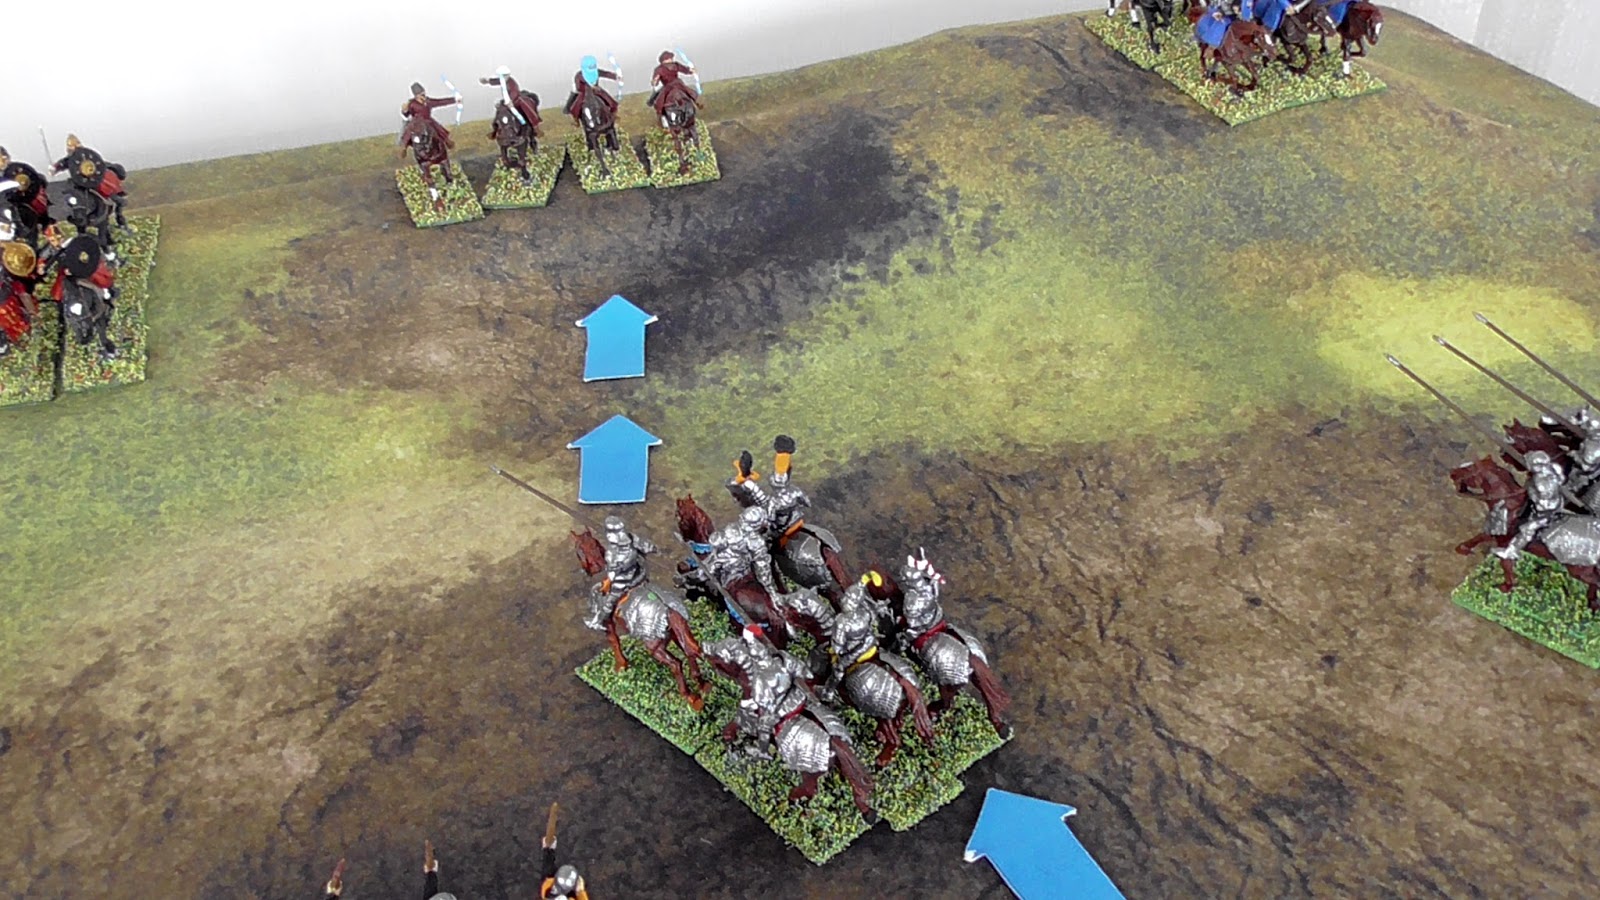
Heavy cavalry charge, and are counter-charged by mounted men at arms.


One casualty is inflicted on the mounted men at arms, but they lose two themselves,


For you, the battle is over..


They are forced to fall back.


The javelins move in to skirmish the wounded men at arms.


They score a single hit, not enough to bother the knights.


The mounted archers unleash on the mixed foot, and score a kill.


More javelin troops move forward to skirmish a unit of mounted men at arms.


They manage to kill one of the knights.


The latest two figures to join the dead pile.


The activations come to an end when the heavy cavalry on the hill, fail to activate.


The mounted men at arms charge their tormentors. The javelins fail the evade roll, so must remain in position, they cannot fire javelins and armour is reduced to 1. They are now sitting ducks for the heavily armoured knights.


Nine hits is 50% more than is required to totally destroy the javelins.


The whole unit of mounted javelins is removed from the table.


The foot archers loose arrows on the mounted bowmen, enough arrows striking for two kills.


Mounted men at arms charge the heavy cavalry, who fail to counter-charge.


Two kills for one is the result.


The unit falls back, fails its morale and is now battered.


The mounted knights need a 5+ to charge, the javelins a 7+ to evade. Oh dear!


For a second time this turn, heavily armoured knights smash into unarmoured and static javelins. The result is inevitable.


The javelins have gone.


Yet another unit of mounted men at arms attempt to charge, but on this occasion, the enemy loose a volley of arrows, with no result, but do manage to evade.


TURN FOUR.

The unit of heavy cavalry fail to rally and rout from the field.


Sheikh al Taif seeing his army crushed, charges and is counter charged by a unit of knights.


Honours are even.


More dead warriors, al Taif survives the lucky leader roll.


His unit is forced back and fails its morale check, becoming battered.


The heavy cavalry on the hill, seeing what has happened to all the other units, decides it is happier staying just where it is!


The Sheikh's unit is confronted by two units of the enemy, the stronger charges home, causing another casualty.


Forced to retreat off the table, I allowed his unit to stay, but a disastrous morale check resulted in the unit routing from the field anyway.


The sheikh beating a hasty retreat


In the final act, mounted knights charge into mounted bows, who fail to evade.


With the expected result.


At this point, I called a halt to the battle, as you can see from the table, only a single unit of the sheikh's army is still on the field.


They beat a hasty retreat after the sheikh.


General Barnardus is victorious again, another nation's army is destroyed and a further glory point to King Hugh III.

'General Barnardus heard the warning call, announcing a rider approaching. He ducked under the tent flap into the sunlight, A single Arab horseman slowed his mount down to a trot and approached the general. The rider said nothing, he simply opened a sack that was hanging from the saddle. From it he pulled the head of Sheikh al Taif, dropping it at the feet of General Barnardus.'